1. The Data Tab
2. Deep Dive of analysed posts
3. Reclassifying
3.1. Adding Topics & Sentiments
3.2. Removing or changing Topics & Sentiments
3.3. Applying the Changes
1. The Data Tab
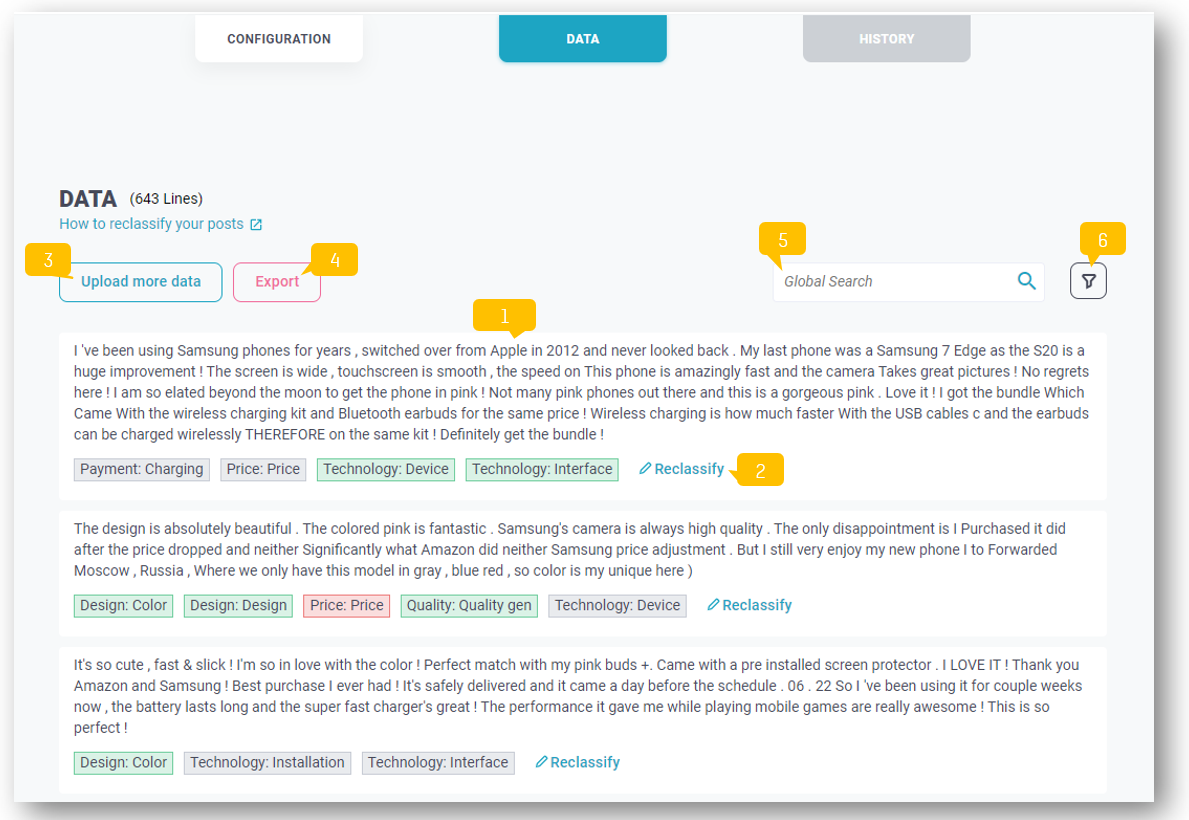
Use the Data tab of your project to do quality checks, reclassify and export the whole dataset with all analysis labels:
- Data overview: Postings from uploaded file + labels
- Reclassify: click here to change the classification (scroll down for a more detailed explanation of how to reclassify)
- Upload more data: click here to add more data to your project
- Export: click here to export the entire dataset with all analysis results
The export file will be an Excel file, containing 4 sheets:
- MetaInfo
- Overall Sentiment
- Topic Sentiments
- Profiles
- Recommendation
5. Global Search: search for specific keywords or phrases within your data
6. Filter Option: Click here to apply different filters to your data. You can filter Category, Topic, Personality (emotional or rational posts), Sentiment (positive, negative, and neutral), Recommendation (promoter, detractor, indifferent), Emotional Connection, Psychographic Segments, and your own meta fields (e.g. brand, product, etc), or enter a date range
2. Deep Dive of analysed post
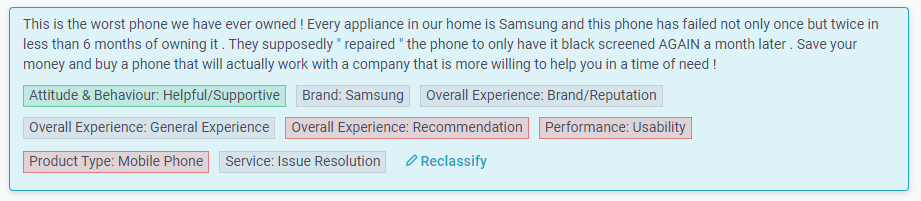
The labels shown represent the Categories and Topics detected as well as the corresponding sentiment (green for positive, grey for neutral, red for negative)
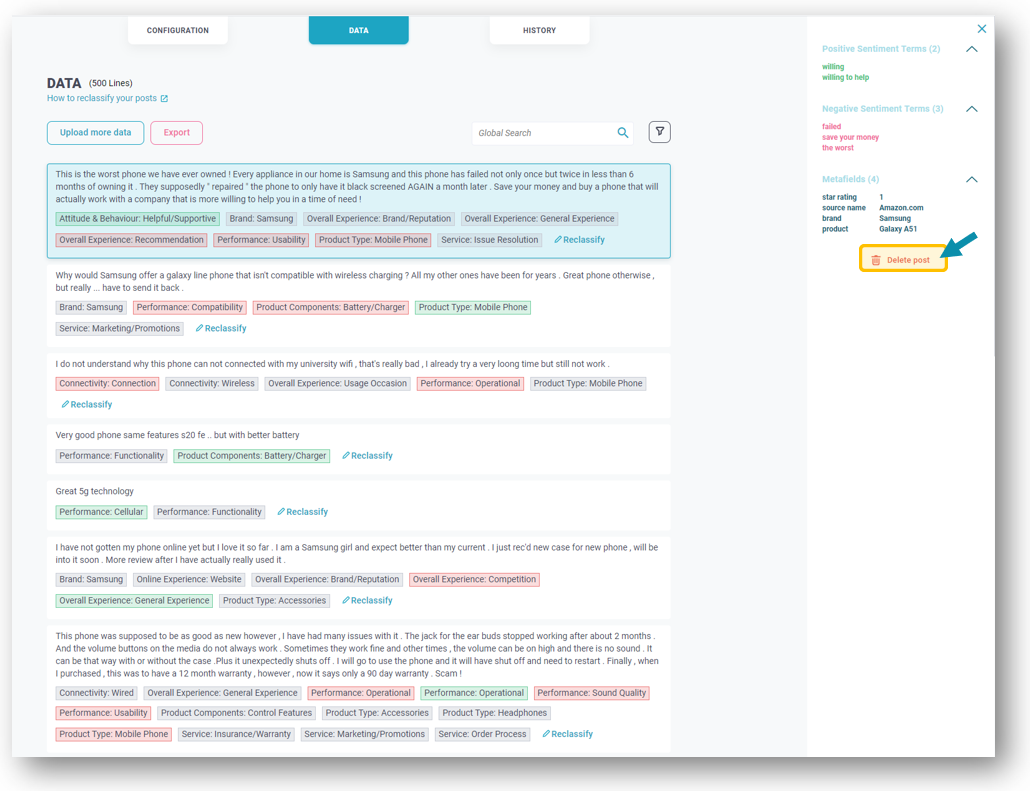
If you click on a post a sidebar will open on the right side, showing you all positive and negative sentiment terms detected within this comment as well as the meta fields belonging to this post.
You also have the possibility to delete the selected post from your dataset:
3. Reclassifying
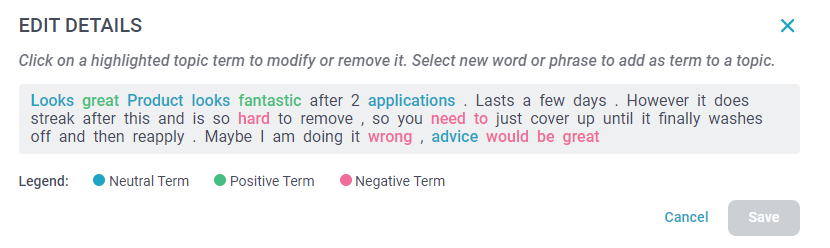
With 'Reclassify' you will have the option to further edit terms in the Data Tab to refine your results: you can add topics/sentiments, change them or remove them:

You may have noticed the color-coding in the post. These show you Topics and Sentiments that have been detected:
1. Adding Topics & Sentiments
Choose your post and mark (or double click) any term/phrase you want to add if undetected. A small box will appear asking you what you want to do with that term. Here you have 2 options:
1.1. Add Topic
When adding the term as a new topic, you need to specify the Category and Topic you want to add it to. Select Category and Topic and click 'Done'. Once added, it will turn blue and be added to your Configuration.
If you don't find a fitting Category/Topic for the term, click on the + next to the selection bar and type in your new, desired Category name. The same applies to the Topics. 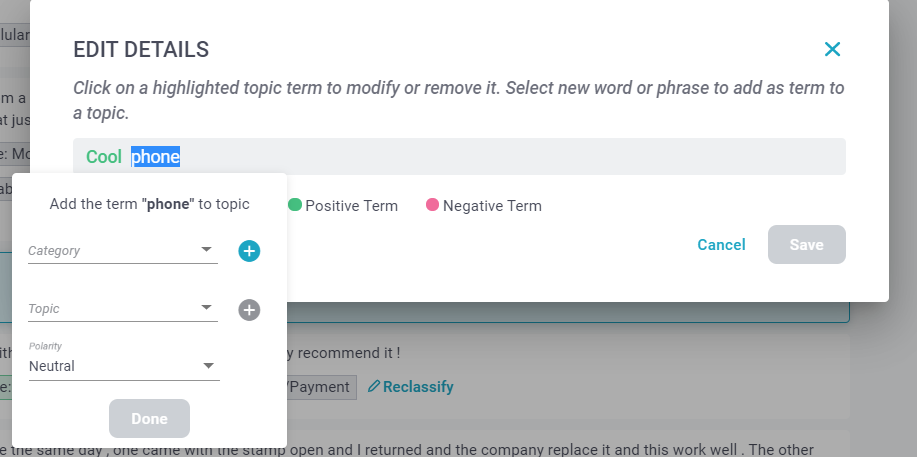
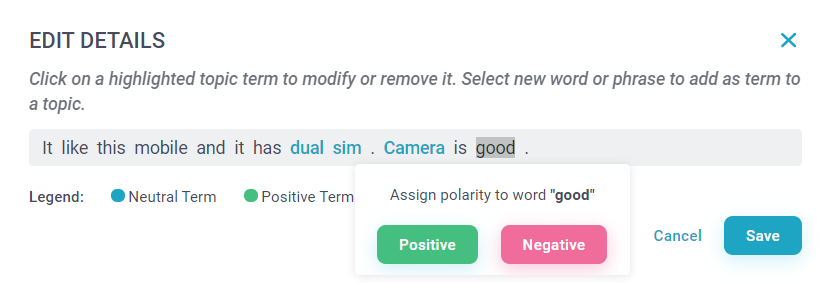
1.2. Add Sentiment
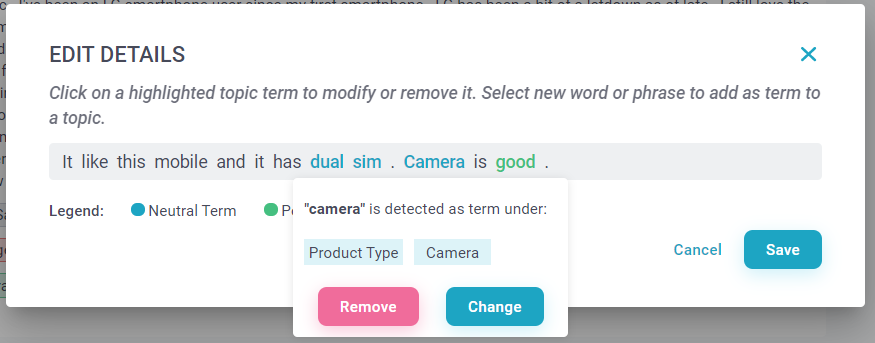
2. Removing or changing Topics & Sentiment
In order to remove a topic or sentiment, just click on the marked term or phrase which is already added as topic/sentiment and remove the detection.
In order to change a topic or sentiment, click the term or phrase and change the selected category and topic or select the preferred sentiment.
3. Apply Changes
Once you're done with all the changes for a post click 'Save'.
When changes are being made a yellow bar will show at the top of your page.
Here you can either view the 'History of changes' or, once you’re finished editing, click "Apply changes". With this, your changes will be applied to your data. This can take several minutes depending on the size of your project.